I used to bake a lot of bread, back when I didn't work so much and didn't have pets or a house to take care of.
When I bake bread now, it is usually this recipe:
Oatmeal Bread
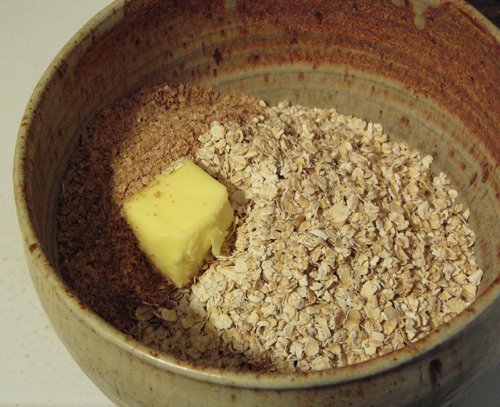
2 cups quick-cooking oatmeal
a handful of wheat bran
2 tablespoons butter
2 tablespoons honey
put oatmeal, bran, butter, and honey in a heat-proof bowl
2 cups boiling water
add boiling water to oatmeal and stir. Allow to cool. You might want to put a plate over the top of the bowl so it doesn't dry out.
Now here's something new for me. A friend's mother (who thought nothing of making two kinds of bread, and cookies, as well as cooking breakfast, lunch, and dinner all in one day!) taught me to let bread rest for ten minutes before kneading. She said that the flour would absorb the water more thoroughly, and you'd use less flour altogether. So that is what I've always done -- mix all ingredients thoroughly, let rest, knead.
Recently I've been reading about autolyse. Today I tried paying more attention to that.
5 cups bread flour
3 cups water
mix well, cover, let rest.
Well, my goodness. I didn't know what to expect from allowing for the autolyse. Didn't know if I would be able to tell the difference at all. It was *astonishing* how much difference it made. I am sorry I wasn't ready to take a pic, because the gluten had activated amazingly. A spoon drawn through it brought up a spoon's width of elongating elastic dough! In 20 minutes, it went from thick paste to something totally entirely different. (Wondering, when they used to make paste for wallpaper of flour and water if they added a bunch of salt, which is supposed to interfere with the autolyse -- I'd like to see anyone get a nice even *thin* coat with the in-love-with-itself stuff I found after the autolyse!)
Now, then, let's make this interesting stuff into bread.
1 package yeast
2 teaspoons salt
add yeast, salt, and oatmeal mixture to the autolysed flour, and mix well, adding flour as necessary.
Hmmm. That was the plan, but..... The oatmeal sat for the same 20 minutes, and was pretty much in-love-with-itself, too, but maybe not in a good way. A gluey glob. Stirring these two together was just not going to happen. (Note on food blogging -- gluey oatmeal clots in stringy bread flour proto-bread is just not a photogenic bowlful!)
Wondering at this point if I'm going to have to throw it out and start over, I turned it out and began to knead. I hoped that all that stiff gunky oatmeal would mix in, and luckily, it did. (NO problem mixing in the salt and yeast; it was the oatmeal that was the questionable item.)
The kneading directions are: Turn out onto a well-floured surface and knead for about 10 minutes.
I always knead in a lot of flour during kneading. I wondered how one was supposed to reconcile this with the attempt to put all the flour into the autolyse, and I don't know the answer. I still kneaded in a lot of flour. I do think, next time, I'll see if I can't get that three cups of water to take six cups of flour, rather than five, before it rests.................
Anyway. We've now kneaded it until it hangs together nicely (and is homogenized, thank goodness!).
Put in a very large greased bowl, and flip so it's greased on all sides.

Cover with plastic wrap, put in a warm place (an oven with the light on works well, if your house is cooler than 80 degrees), and allow to rise until doubled. Depending on the temperature, this rise takes from 1.5 hours to ... more. Today the furnace is on, so the temp in the house is around 65. After two hours, I decided it had risen enough. (I had to go run some errands, so I did not turn on the oven light for warmth.)
Punch down (fun, if not strictly necessary), and turn out onto a floured surface. Knead out the air bubbles.
Hmmm. This dough is *way* more sticky than usual. Generally, once the bread has been kneaded well the first time, it's not that sticky any more. A little, but not too much. This dough would not leave my fingers alone. Cleaning dough off my fingers is not my favorite part of all this......... Ahem. Ok, wash hands AGAIN, and proceed......
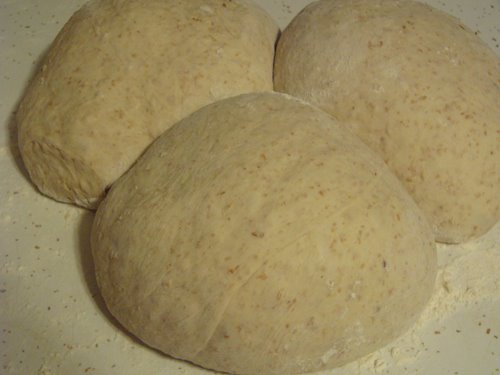
Divide in three parts and shape into rough balls. I have a cheapy kitchen scale, and I weigh them to get them about the same size. These were 1.75 pounds each. Nestle them up to each other, cover with the large bowl used for the first rise, and let them sit while you grease the loaf pans.
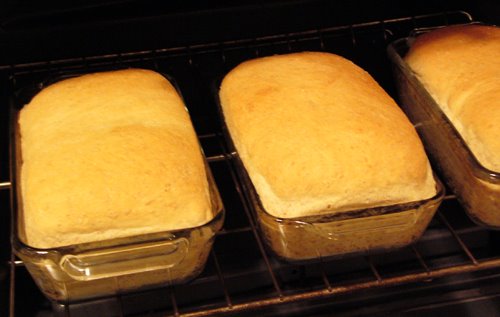
Shape into loaves, put in the pans, and put in a cold oven (just the light on, if the weather is cool) to rise again. This rise takes about 1 hour. I declare boredom and turn the oven on when the bread is about half an inch higher than the sides of the loaf pans. Turn the oven on to 350 (with the bread still in the oven). Bake for about one hour.
I like to use glass bread pans -- when the bottom of the loaf is nicely golden, it's done.
Loosen from pans by sliding a knife around the sides of the pans. Turn out onto towel-covered racks and cover with a towel.

We always eat the first loaf hot out of the oven. Yes, the slicing squishes the bread, and the slices are sort of smooshed, but who cares? The other loaves cool in their towels. The second one goes in a plastic bag, to be eaten over the next couple of days, and the third goes into the freezer.
Did paying attention to autolyse make a difference in the final product? I couldn't tell. Home made bread is so good, it's hard to tell if it's better than that......
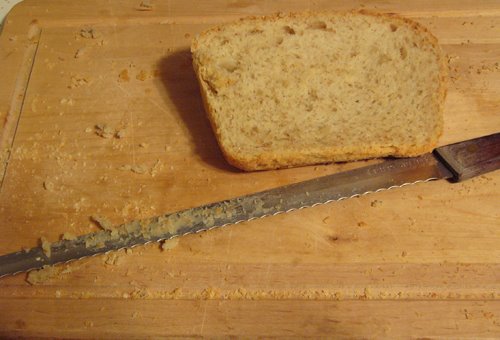
You can see that after cutting the whole loaf, the knife was a sticky mess. The heel you see here was the first cut. Yeah, there are some sticky ball things on there, but.... Would *you* turn it down? Hot out of the oven? Subsequent cuts were a bit worse, but not bad enough to even consider (imh) waiting for it to cool before cutting.
Happy Bread Day!


2 comments:
i want sommmmeeeeeeeeeee :(
val
Ooooo yeah.
Cassi
Post a Comment